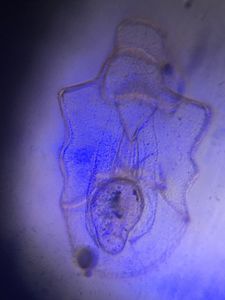
Simple dark-field : improve your imaging contrast with another classic microscopy technique
 Jun 24, 2015 • 8:47 PM UTC
 Unknown Location
 140x Magnification
 Unknown
bullm
Learn about the author...
3posts
0comments
1locations
Introduction and motivation:
Dark- field microscopy is an essential microscope technique which allows you to see small features with high-contrast. This technique is named for its appearance — the background looks darker than the features you are imaging. This is in contrast with the technique of “bright field” in which the background is unscattered light straight from the light source (your foldscope is equipped to do “brightfield” upon arrival). Often, looking at the same sample in dark-field can give you a very different picture of the same sample (examples to come). Both techniques are essential for the explorers toolkit.
Goal:
Here, we instead present a simple and easily adjustable modification that should allow you to get simple dark field. This post is in part intended to encourage users to play around with the instrument and try to engineer better solutions and new imaging modes. The hope is this may be an accessible and rewarding starting point for those enthusiastic about improving the capabilities of their foldscope through simple (and reversible!) customization.
Quick (and simple) optics
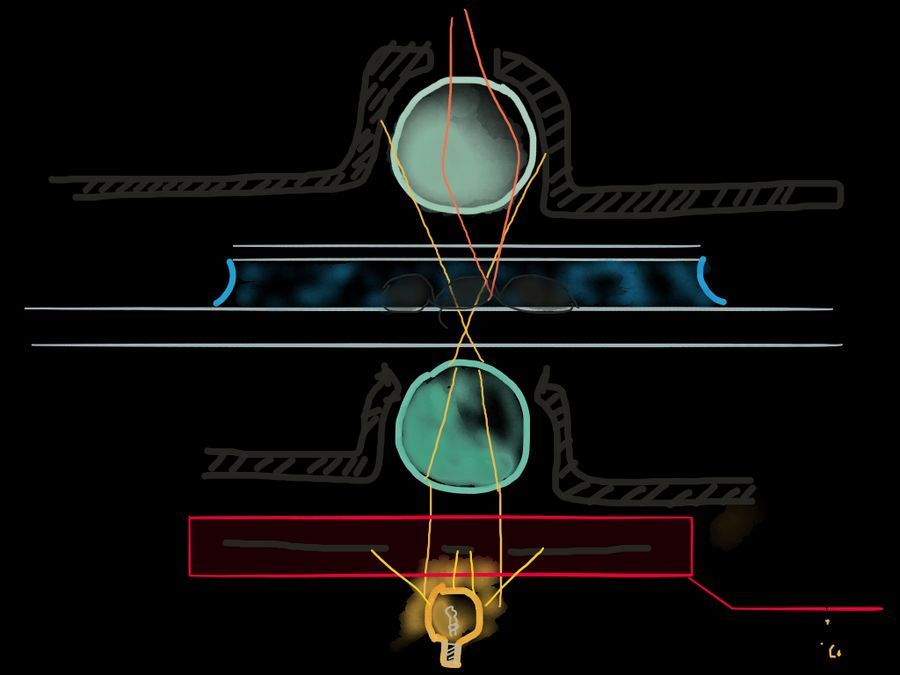
The optics of dark-field are simple. The idea is to illuminate your sample such that only scattered light makes it into the objective. Practically, this means removing all of the rays of light (or spatial frequencies) which are collected by the objective lens. Forms of dark field can be achieved simply by illuminating the sample from an extreme angle. (To test how well this works, you might try adjusting the position of your LED relative to center of your objective lens). In this post, we review a symmetric form of off-angle illumination using the included condenser lens (the ball lens with the bigger aperture), the light source module, a clear plastic (or glass) piece square, double-stick tape and a sharpie (or equivalent) marker.
A sketch of the optics should look something light this.

Light travels from the bottom to the top (light source in yellow). The added component is the red box and represents an annular aperture between the light source and the condenser lens. When the central rays are completely blocked the background of the image should be dark (because yellow rays do not make it out of the objective lens). However, the scattered light — signified by orange light — can create new rays which couple into the objective. Therefore you only see scattered light from the sample. Note in the quick sketch above, the unscattered light is yellow and the scattered light is orange-ish. Only scattered light is picked up by the objective and the rest is lost onto the aperture (the black plastic piece holding the lens).
Methods and protocol:
(1) Take your assembled scope for bright field (using the battery light module) and remove the back panel as follows. Make sure you have double stick tape and a condenser lens (should have come with the kit).
Methods and protocol:
(1) Take your assembled scope for bright field (using the battery light module) and remove the back panel as follows. Make sure you have double stick tape and a condenser lens (should have come with the kit).
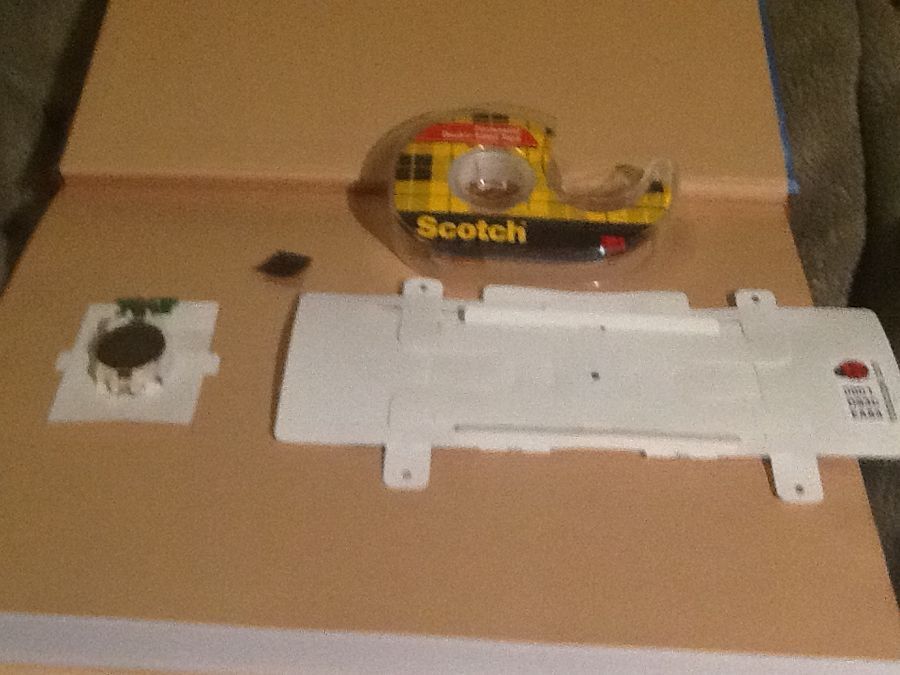
(2) Acquire a piece of clear plastic (I started with a 170um glass coverslip, but transitioned to a cut-out of a transparency) or put multiple pieces of clear tape together to give a nice optically clear window.
(3) tape the window onto the back of the condenser lens (opposite side of the smaller hole; the flat side). Double stick tape worked well for me.
(4) use a sharpie to make a dark spot about the size of 2/3 of the visible ball lens. It helps to go over it a couple times to make it as optically opaque as possible, Mine looks something like this: Note that each time you go over the sample you add some of the ink but also more of the solvent so the final coloring should be to redistribute the wet ink as equally as possible. What worked for me was “dotting” in multiple locations instead of “smearing”.
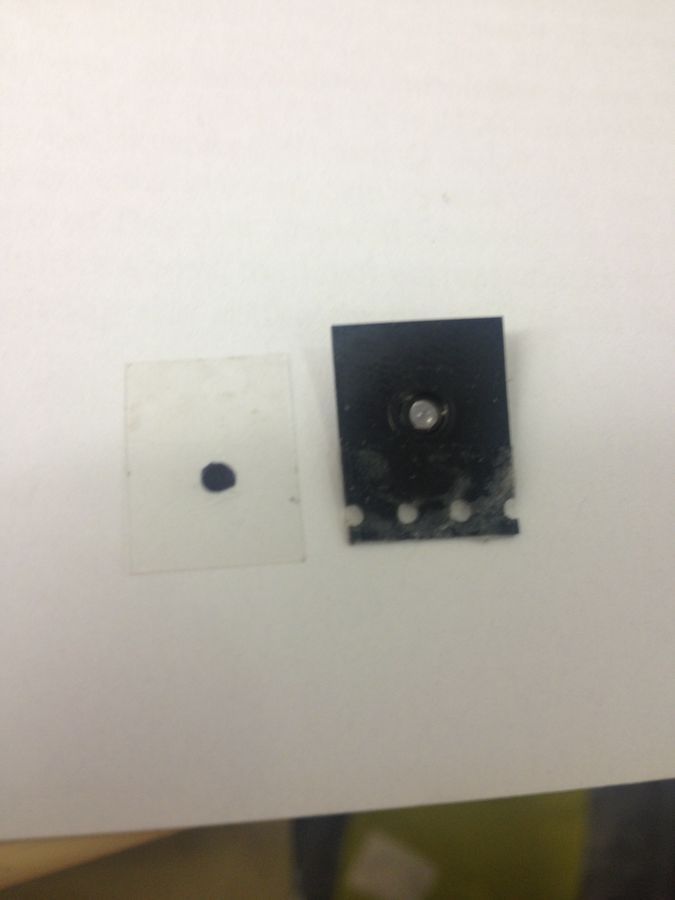
Clear plastic piece with sharpie dark-out in center next to the condenser lens with double-stick tape across the top. (5) Mount the condenser on the foldscope and without a sample hold the instrument up to light in “solar” mode. You should see almost no light getting through. If you see light make your spot either darker or slightly bigger to block the rays making it through the optical system shown in the schematic above.
(5b) **Optional** Add a scattering piece of paper between the condenser and the lightsource. Toilet paper can work well here if you take a single layer of it. This can help improve the uniformity of your illumination but also contributes to the loss of light. If you have intensity to spare and nonuniform illumination, this addition might help.
(6) Assemble your foldscope and put a sample in place. Look for strong contrast at edges in particular where you have a lot of scattering surface. Adjust the alignment of the spot, the condenser and the source until you see a nice dark blue background with a scattering body from the sample. Examples are following.
All images are collected on an iphone 4s using the magnetic coupling.
Results and some images of fruit fly embryos
In what follows, I demonstrate the difference between the bright-field and dark-field imaging capabilities on fruit fly embryos. After sharing a sense for the differences we will consider a sample where dark-field gives dramatically different information that bright-field: that of the live imaging of a near transparent starfish larvae.
Fruit fly development is well studied. Here we look at late-stage embryos developing into the larval form. The goal being to see if we can resolve differences in the images.
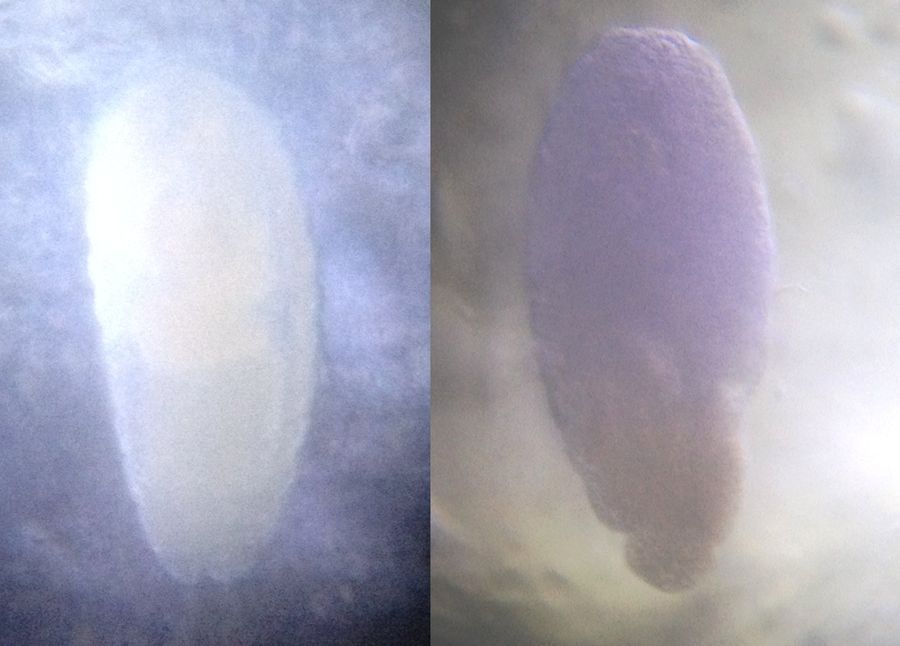
Left: Dark-Field image
Right: Bright-field image Along the left side, both images show the emergence of some ridging into what ultimately will define the segments of the fly’s body. There also appears to be some internal structure visible in the dark-field image. See if you can use this video (https://www.youtube.com/watch?v=FChS4KU5jDM) to identify how old these embryos are.
Final example: Dark field of transparent larvae
A clear situation in which dark-field should help is in the imaging of a transparent larvae. In the following video, we compare the imaging of a bat star larvae in both illumination methods. This demonstrates clearly a situation in which dark-field helps you understand better what is going on.

While this dark-field implementation does not yet match the performance of table-top scopes, it provides a valuable channel of information none-the-less. Notice the clear improvement in the ability to resolve the internal structures as well as the outline. We also see glimmers of the characteristic feature of dark-field: bright edges with large scatter.
Ways to improve – show us your method
There are many ways to improve on this implementation. You can begin by optimizing the size of your light block to reduce the collection of unscattered light. Also note that sharpie does not fully block the transmission and thus gives a bit of a blue background. Using an optically opaque paper should improve this. Also we suffer from loss of too much light as the block size increases. One way to counter-act this may be to (a) increase brightness of the light-source, and (b) redirect instead of blocking the used light into a single parallel line of rays.
Share your implementations with the community!
Conclusion
We have set out to demonstrate the addition of a single optical component to make a dark-field foldscope with the simplest possible modification. Many alternative methods for achieving the same imaging mode can be made each with their own advantages. This method is simple, easy to align and reasonably effective. Further it allows foldscope users to reversibly modify their components and is therefore safe for all users to try. We hope dark-field microscopy becomes a readily available tool and that future implementation can begin to match the performance of table-top microscopes.
Sign in to commentNobody has commented yet... Share your thoughts with the author and start the discussion!

 0 Applause
 0 Comments