Pollen Hunter project– exploring a staining protocol
 Apr 14, 2015 • 9:37 PM UTC
 Unknown Location
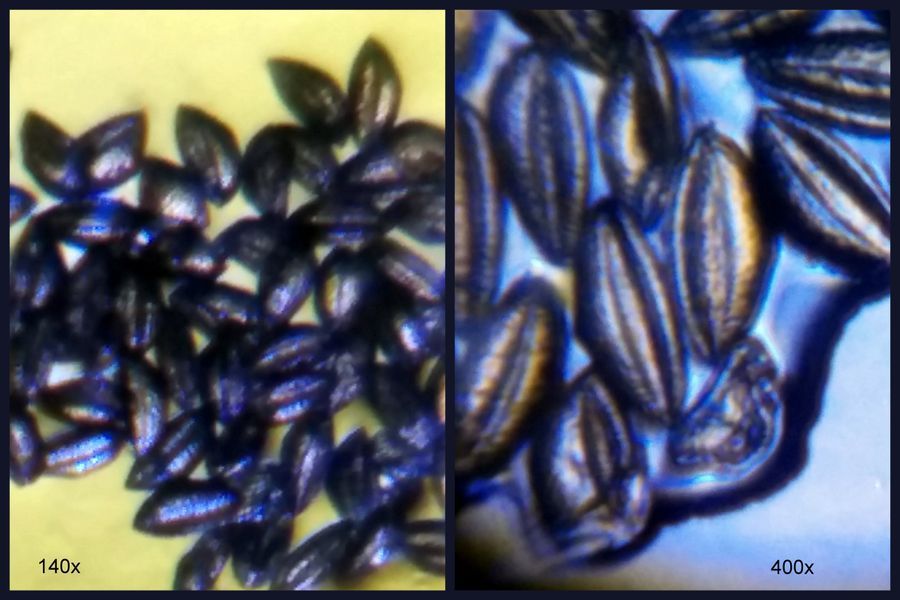
 140x Magnification
 Microorganisms
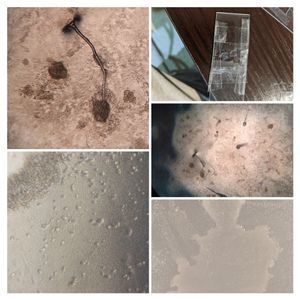
Laks Iyer
Human observer of life. https://sukshmadarshin.wordpress.com
97posts
1255comments
5locations
View in Media Gallery
Continuing from my previous post , I have now begun foldscoping pollen from various flowers. After the first trials, I even posted pictures from my first 9 flowers . However, I was greatly bothered that the pollen morphology seemed to change after staining. In particular post-staining they mostly looked spherical. I admit that the staining protocol I used was the simplest that came to mind, i.e. stain with an aqueous solution of Safranin O. I didnt bother to look at the extensive pollen literature. I knew that most pollen are surrounded by two walls, the inner wall known as intine and the outer exine. The tough exine is mainly made of sporopollenin and has all the interesting surface features used in pollen classification, and since these are plant cells I assumed staining would enhance these features. How wrong was I when I saw spherical pollen? I turned to the internet and realized that the professional palynologists stained pollen with chemicals that I cannot buy for a home lab. I then stumbled upon an nice article by Dave Walker in Microscopy UK , wherein he describes the use of a 50% alcohol wash followed by suspension in 50:50 glycerine:water. Further searches led to to another article where a few drops of safranin O was directly dissolved in glycerine. Based on these I first decided to do a simple experiment.
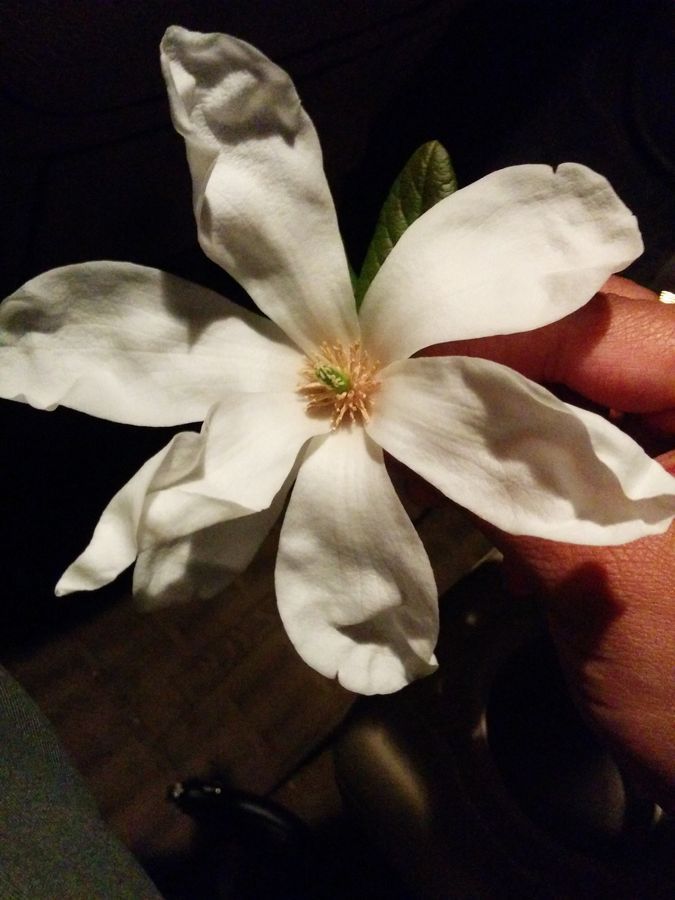
I had collected a nice big Magnolia flower. Magnolia are an ancient species and fossils of the same have been found from beds over 90 million years ago. The sepals and petals of these are fused into a rubbery tepal and the flowers have a nice sweet smell. They bloom early in spring in the dc area. Also, they makes a lot of pollen.
I had collected a nice big Magnolia flower. Magnolia are an ancient species and fossils of the same have been found from beds over 90 million years ago. The sepals and petals of these are fused into a rubbery tepal and the flowers have a nice sweet smell. They bloom early in spring in the dc area. Also, they makes a lot of pollen.
View in Media Gallery
I decided to try the staining in three conditions. 1. .005% Safranin in water. 2. .005% Safranin in 50:50 Glycerine:water and 3. .005% Safranin in Glycerine. Glycerine was readily available at a local pharmacy and Safranin O I purchased from here .
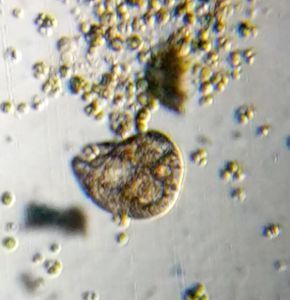
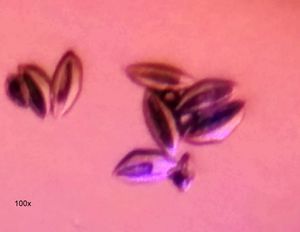
Here is a picture of it before staining.
Here is a picture of it before staining.
View in Media Gallery
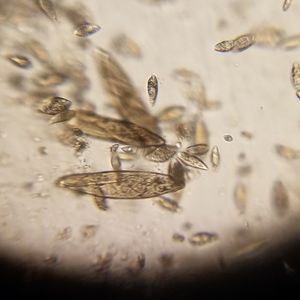
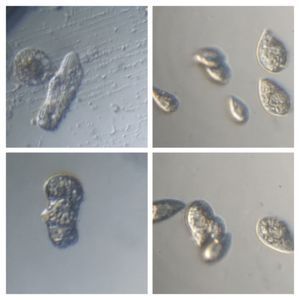
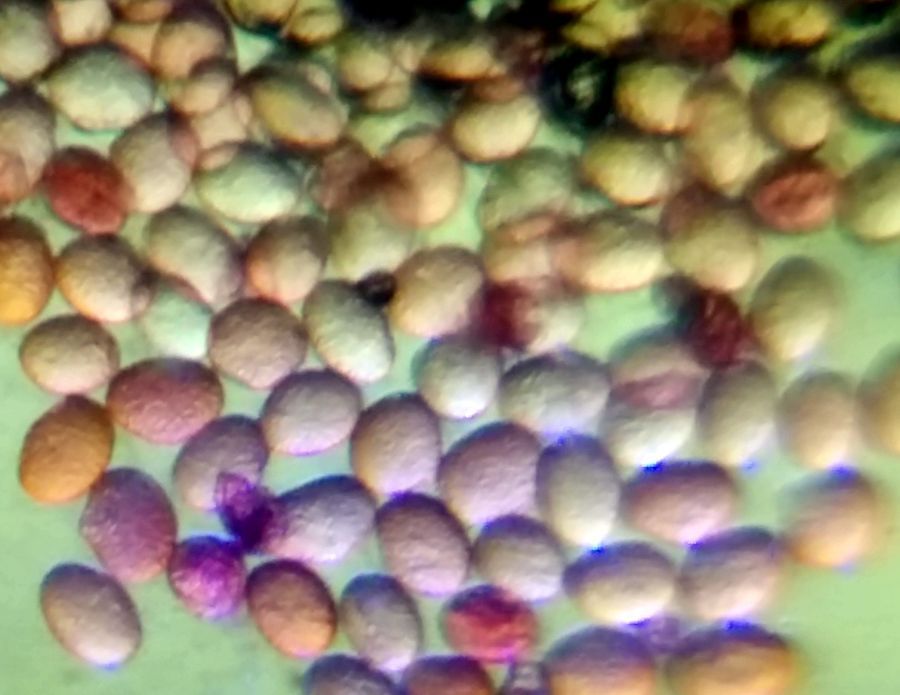
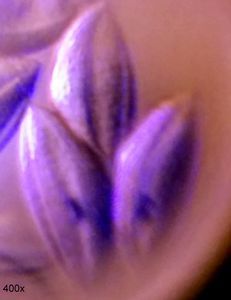
Now this is what I observed within a minute of dropping the .05% Safranin stain. Nice egg shaped pollen, none of the beautiful structure.
View in Media Gallery
I even took a movie but the process of hydration and sphericization was almost already done before I could get my clumsy hands to it. I caught some of the terminal process and you can see the exine sticking out, almost like the pollen are removing their vests.
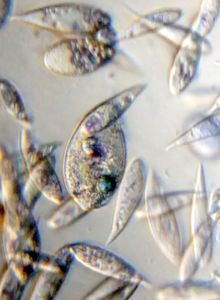
So I tried the second stain with .05% Safranin in 50:50 Glycerine:water. This was much better, but to my horror in 10 minutes they too hydrated forming nice egg-shaped structures. Here is a movie I managed to take of the same.
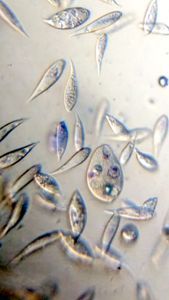
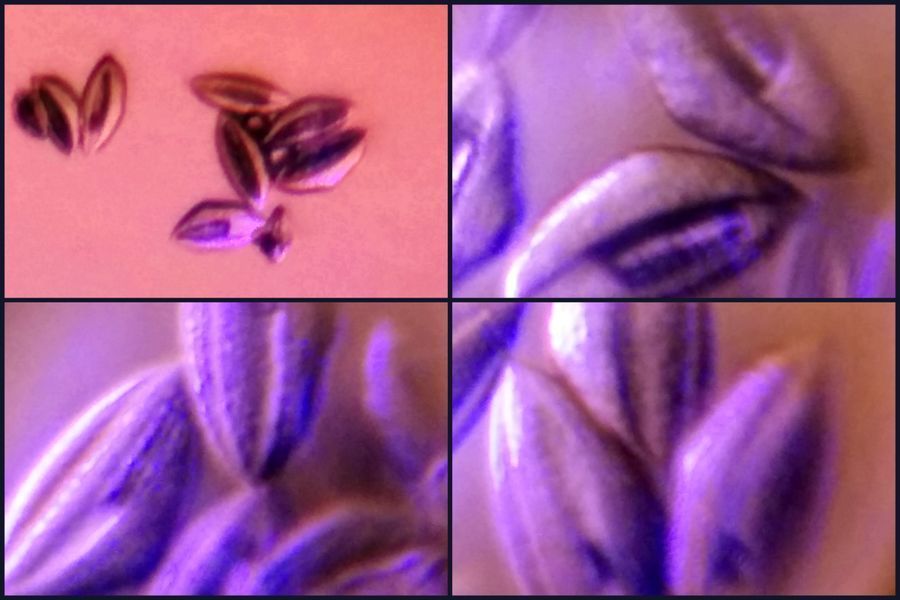
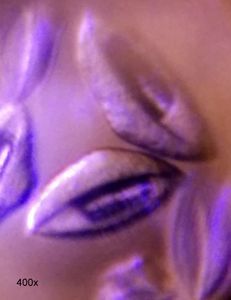
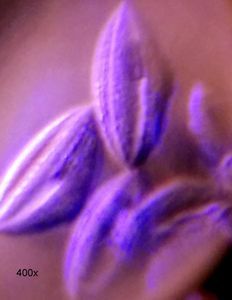
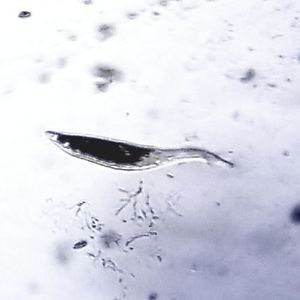
Glycerine is messy. Try it with Safranin. I had it all over my scope as I hadnt put the tape on properly. So while I put the pollen in .05% Safranin in Glycerine I had to clean the foldscope. It took me over 30 minutes before I cleaned up, washed the lens and had a look. The pollen had hydrated a bit, but not lost their nice shape, they also showed nice surface features, although they didnt take up much of the stain. All this finally explains why my stained pollen were circular in my previous post. Henceforth, I will use the safranin in glycerin method for the pollen collection and would recommend those who want to join in for the project to use this. Perhaps a higher concentration of Safranin might color the pollen well, but from these experiments it is clear that pollen need to be gingerly hydrated. Perhaps this is why palynologists use a very complicated protocol to study it. I think this staining/hydration process is a nice middle ground.
The bigger question is why does this happen? Do different pollen have different strengths of their exines? Does this have any evolutionary significance? Anyone with answers? I guess I will now have to go back to collecting flowers again and rehydrating/staining some of them. Learning my lessons but having fun in the process.
P.S. What was interesting is that after 24 hours, even the pollen suspended in glycerine lost their exine and became circular. This suggests that glycerine with stain can be used to hydrate the pollen well enough for one to take pictures and seems to remain in shape for enough time, but it isnt the permanent mount by which you can store this in your slide box. It is useful for capturing surface features though.
P.S. What was interesting is that after 24 hours, even the pollen suspended in glycerine lost their exine and became circular. This suggests that glycerine with stain can be used to hydrate the pollen well enough for one to take pictures and seems to remain in shape for enough time, but it isnt the permanent mount by which you can store this in your slide box. It is useful for capturing surface features though.
Sign in to commentNobody has commented yet... Share your thoughts with the author and start the discussion!
 0 Applause
 0 Comments
_300x300.jpeg)